")
")
")
")
")
")

|
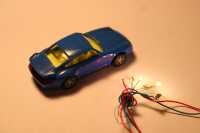
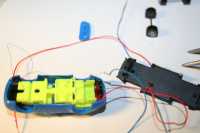
For the conversion you need a model car, a conversion kit with 2 red and 2 white LEDs with series resistor, a felt pen, tweezers, superglue and various tools. |
 |
|
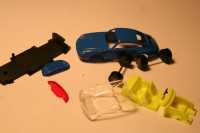
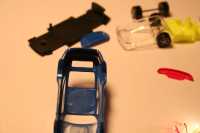
With a lot of feeling, the car is dismantled into its individual parts. Wheels, axles, seats and windows are carefully removed and put to one side. |
 |
| To prevent the light-emitting diodes from shining through the bodywork later on, paint the area around the headlights on the inside with a large area of black felt-tip pen or paint. | 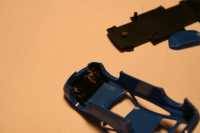 |
|
The area of the rear lights is also painted black from the inside. |
 |
|
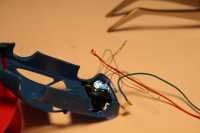
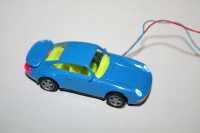
Now you can install the white diodes for the headlights. Use super glue for this. Put a drop of glue behind the plastic of the headlight and glue the LEDs from the inside. |
 |
|
It is advisable to connect the voltage to the diodes in the process. One immediately recognises an accidental interruption of the circuit during construction. With a little dexterity, this can be done relatively quickly. Then let the superglue dry well. The LEDs for the rear lights are also attached from the inside using superglue. |
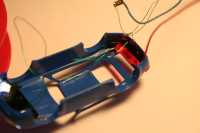 |
| Use a drill to drill 2 holes in the floor of the vehicle. There the balue and the red connecting wire is pushed through from the inside. Now reassemble the car. | 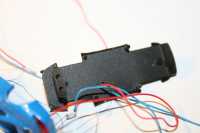 |
|
Again, it is recommended to do this when the LEDs are lit, and to work with the utmost caution. |
 |
|
You should lay the enamelled copper wires and the series resistor inside so that nothing can be seen from the outside and the wires are not pinched. |
 |
|
Now carefully glue the base back under the body using superglue and secure the connecting wires to the base using a drop of superglue for strain relief. |
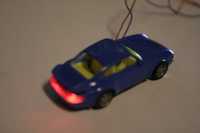 |
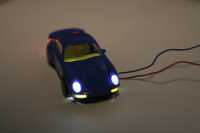
| You can see whether you have worked carefully .......................... if you darken the light a little. |
|
- You are here:
-
Home

- modification